Glass TOC Workflow: Loading Instrument Readings
Create new Reading
Glass organizes data collection by Assay (the experiment). Each Assay is made of multiple tasks, one for each family of measurements required to complete the experiment. Anytime new instrument results are available they can be appended to the experiment using the “Reading” feature.
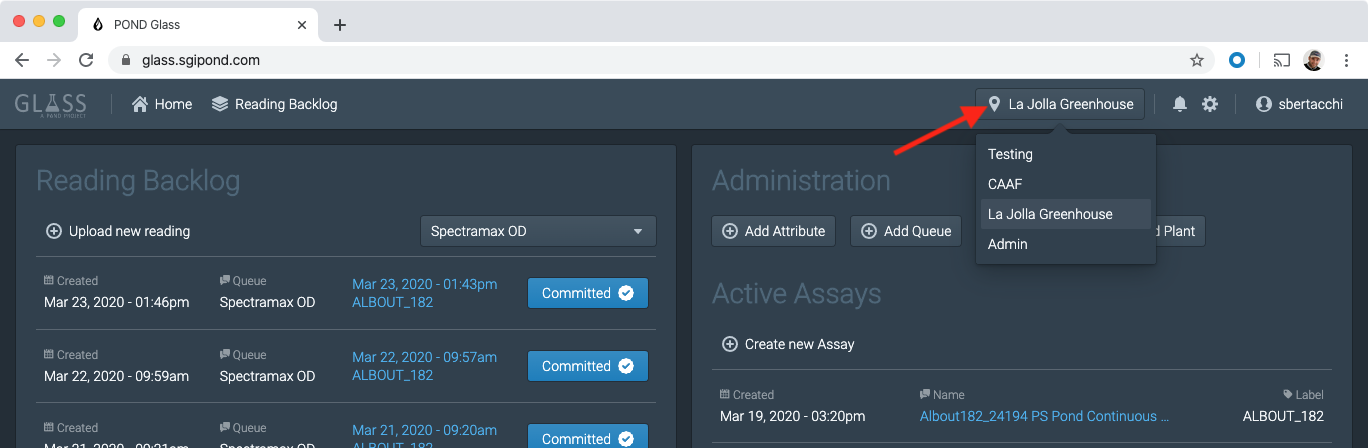
Before starting make sure your Glass instance is pointed to the correct facility:
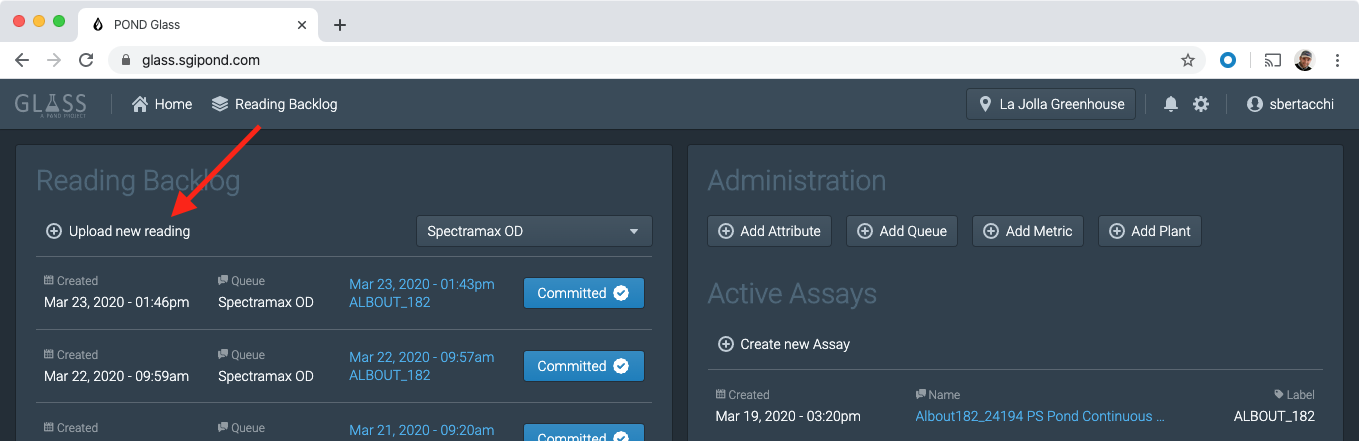
To create a new reading, on Glass’ home page, click “Upload new Reading”.
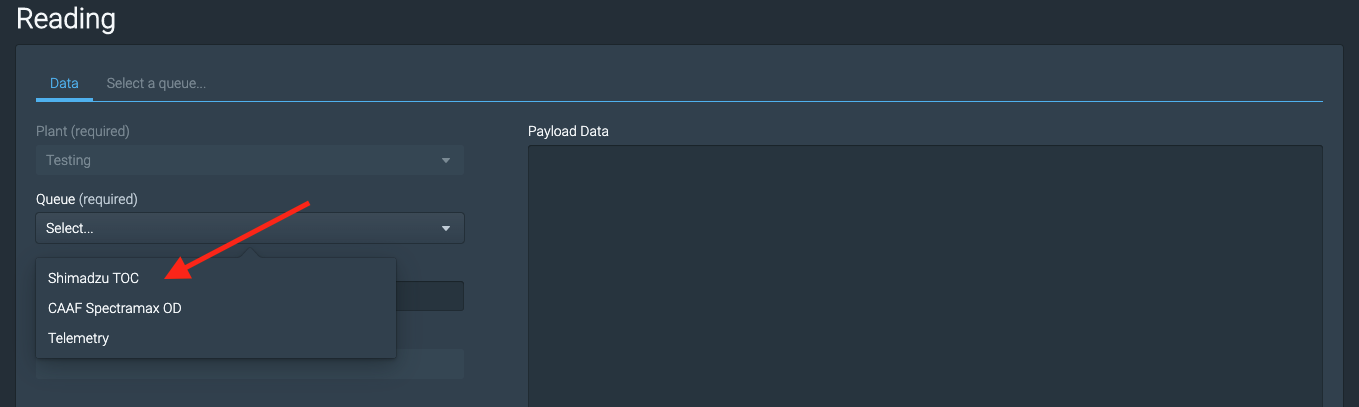
As a new empty reading is created, open the “Queue” menu and select Shimadzu TOC, no need to fill in the remaining fields.
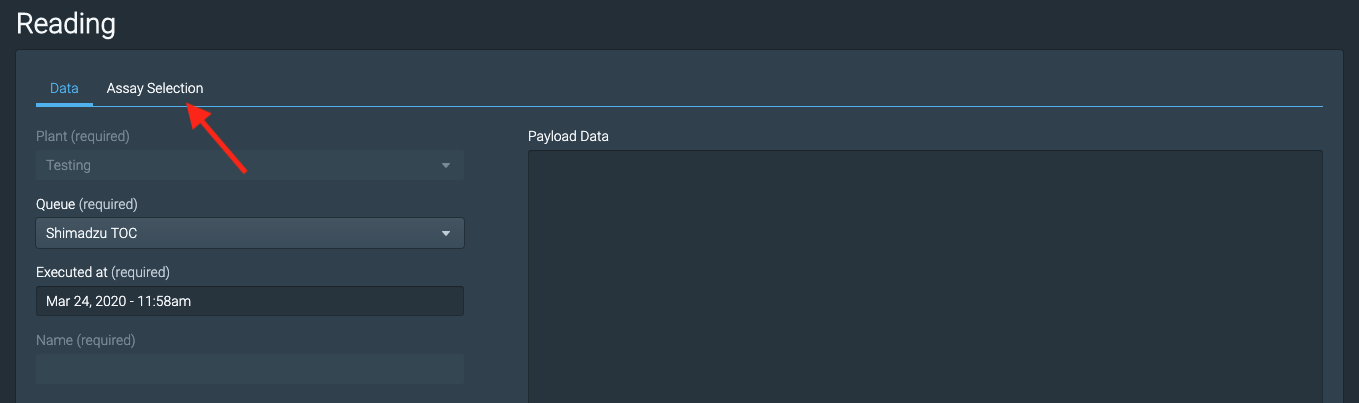
To continue to the instrument run configuration click on the “Assay Selection” tab.
Generate instrument configuration
To make sure the instrument results correctly map to the experiment definition the carousel layout must match what we previously configured in the “TOC” Task of this experiment.
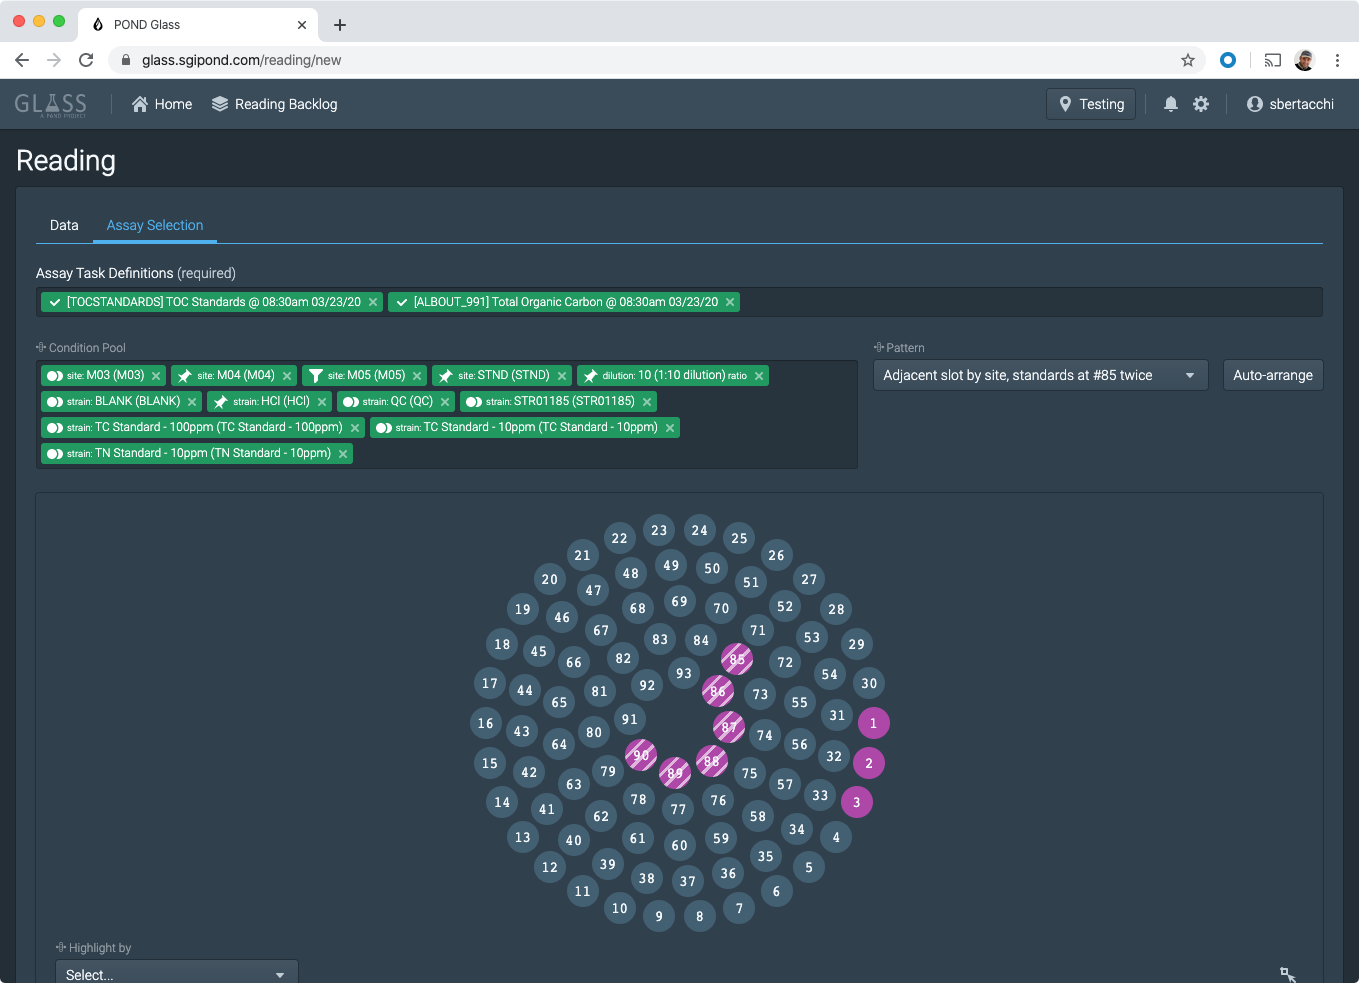
To accomplish that Glass is able to generate a configuration file which the instrument software can import. In the Assay Selection tab Start by selecting the Task related to the experiment your samples belong to.
If “Standards” vials must be included add also one TOC Standards item.
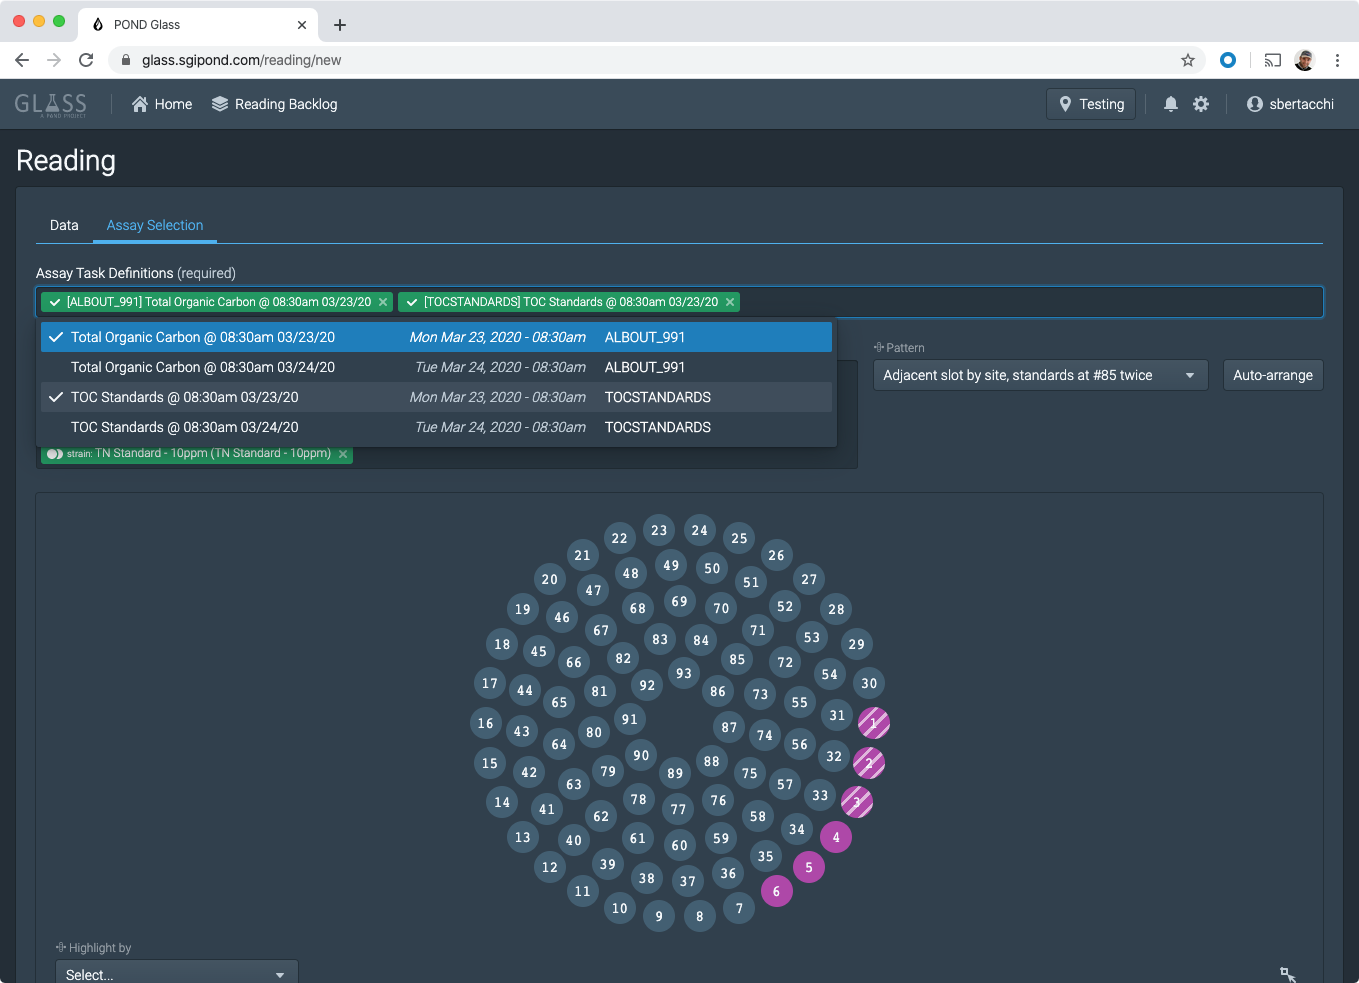
Click “Auto-arrange” to have Glass automatically position the vials in the carousel according to a predefined sequence.
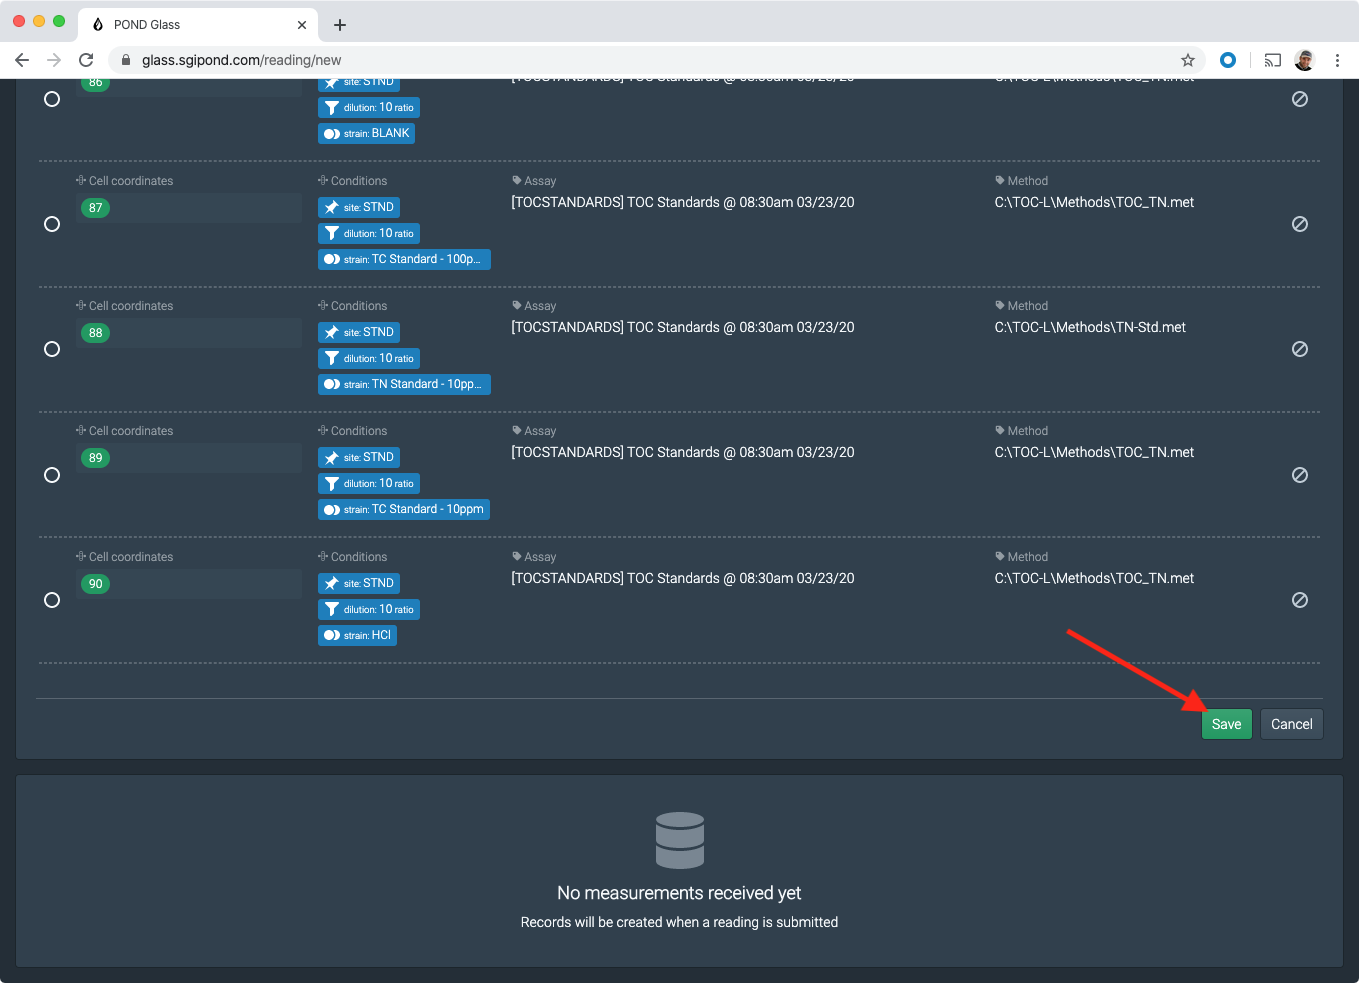
Scroll to the bottom of the page and click “SAVE” to confirm this layout for the instrument run you’re about to start.
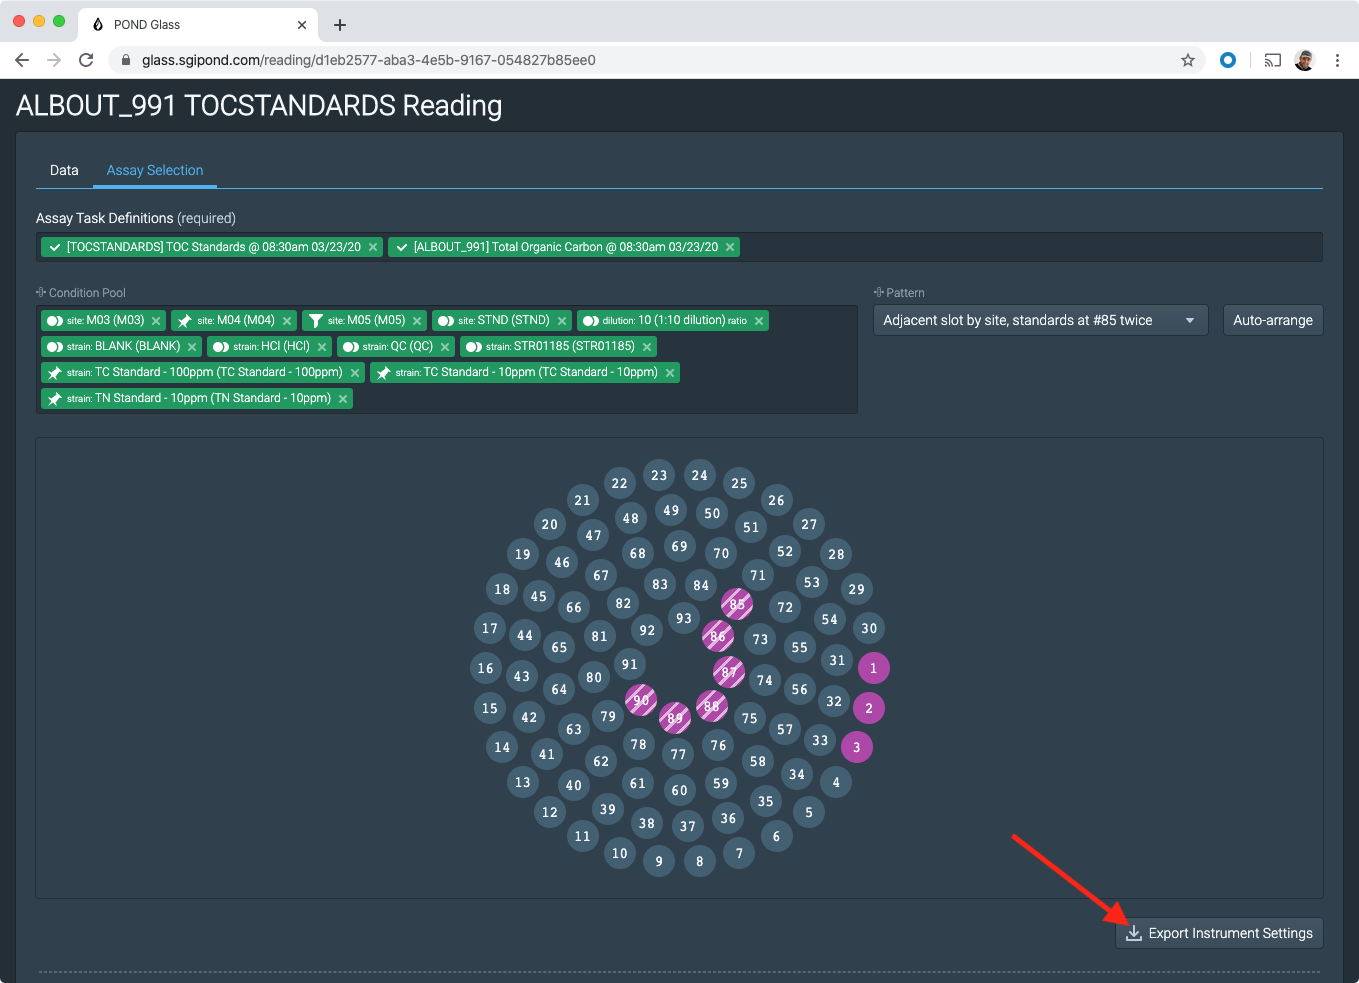
Once the layout is saved you can generate the instrument settings file by clicking on “Export Instrument Settings”.
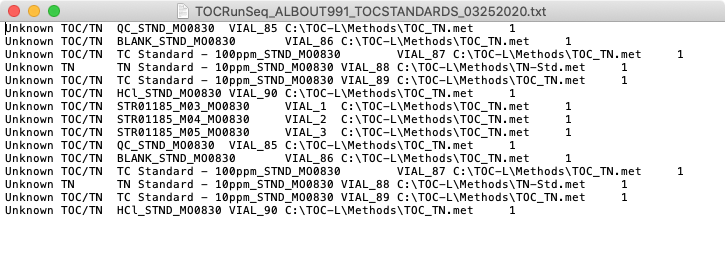
A file download will start, file content looks like this:
Configure and run the instrument
Open the TOC-L software and import the configuration file
MISSING SCREENSHOT
Open the vial settings and make sure the Vial column matches the sample label. For example where label is “VIAL_12” then Vial should be set to “12”
MISSING SCREENSHOT
Run
MISSING SCREENSHOT
Import instrument results into Glass
Once the instrument run completes click on File > Ascii Export > Normal.
Save the file where you can find it
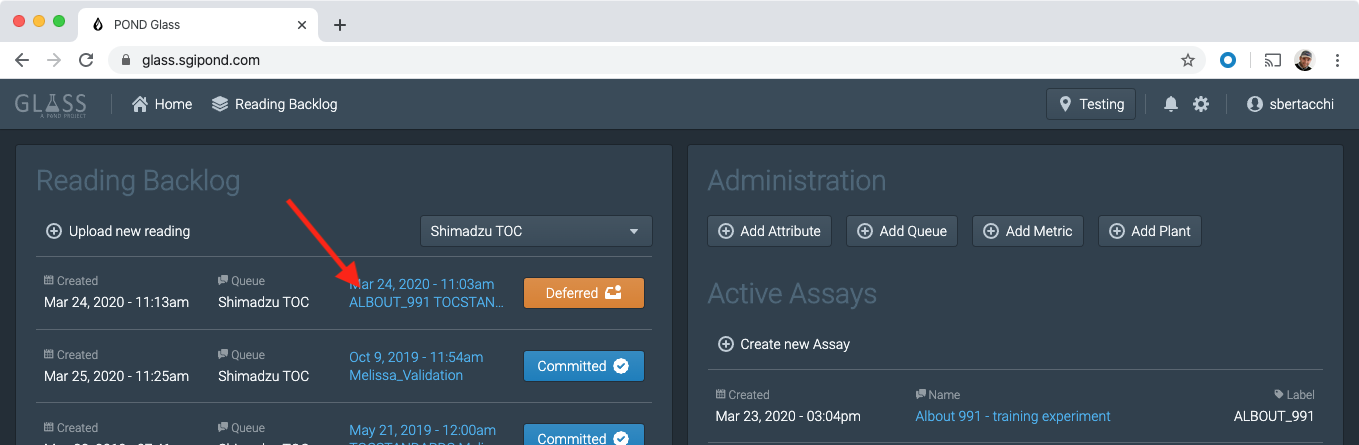
Open Glass home page, the reading you created at the beginning of this tutorial should be marked “DEFERRED”. Click on the label to re-open the reading.
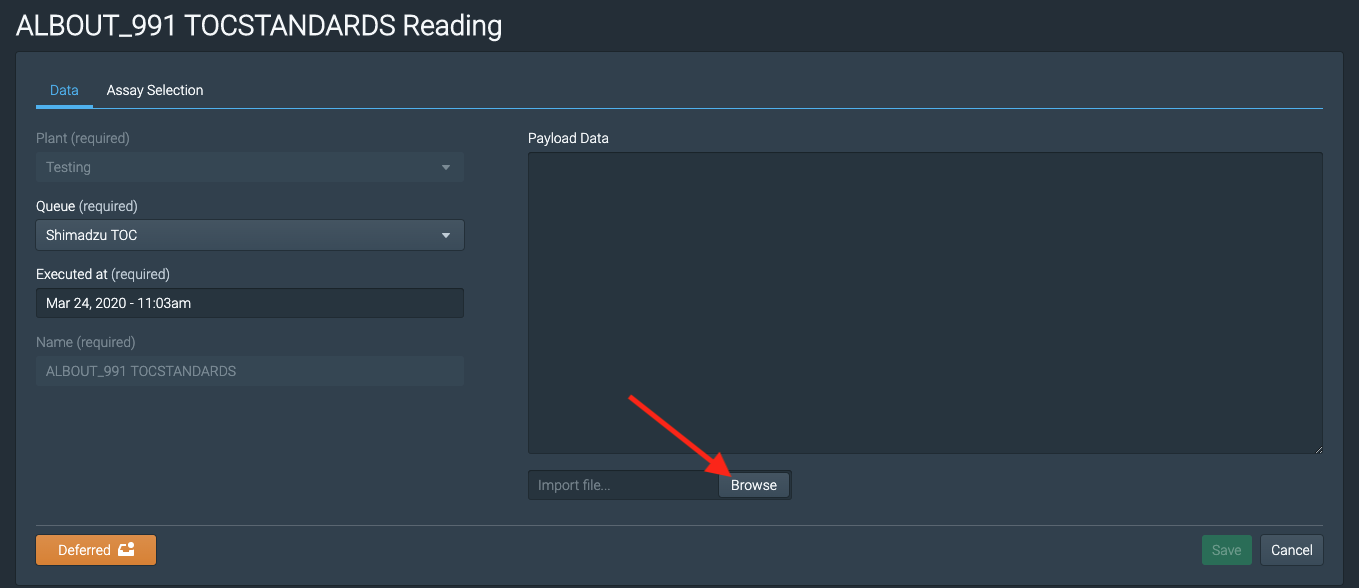
Now click on “Browse” then locate and select the file you just exported.
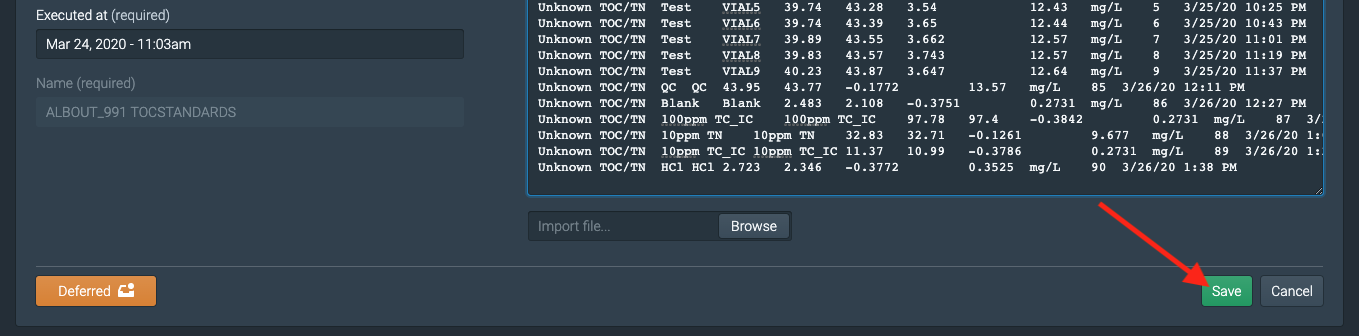
The content of the file will appear in the “Payload Data” area, click “Save” to upload it.
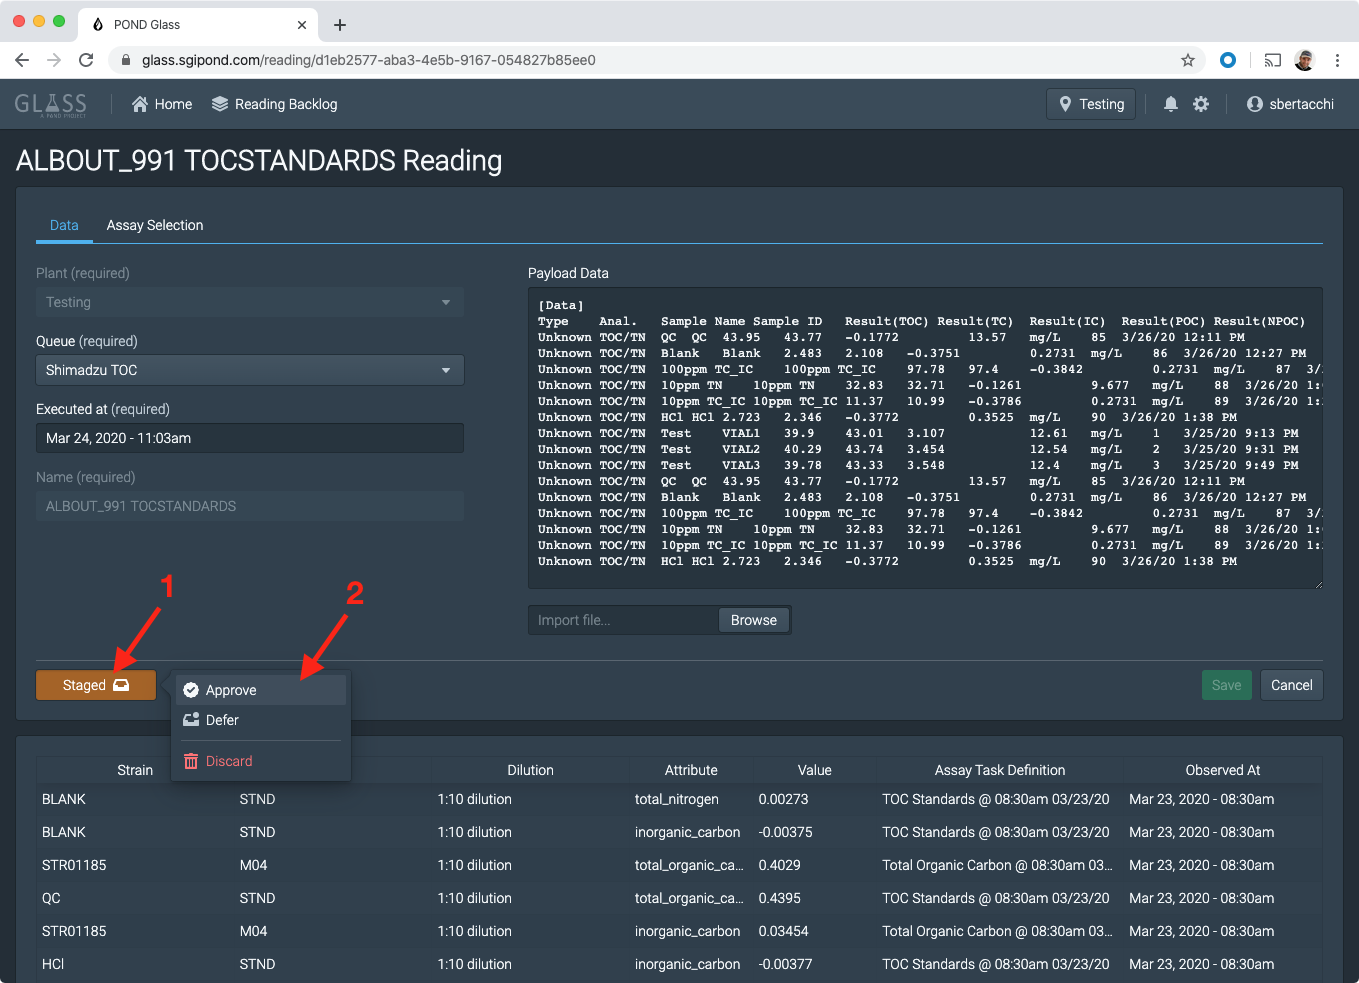
After parsing the data Glass displays a preview of the measurement records including values and experiment metadata. If the records appear correct open the state menu and change the reading state from “Staged” to “Approved”.
The reading is now “Approved” and all the measurements have been recorded and distributed to the rest of the system. You are done.
Back to Glass TOC Workflow